The Major Up & Down Forces: Part 2
Read MoreRami's Blog
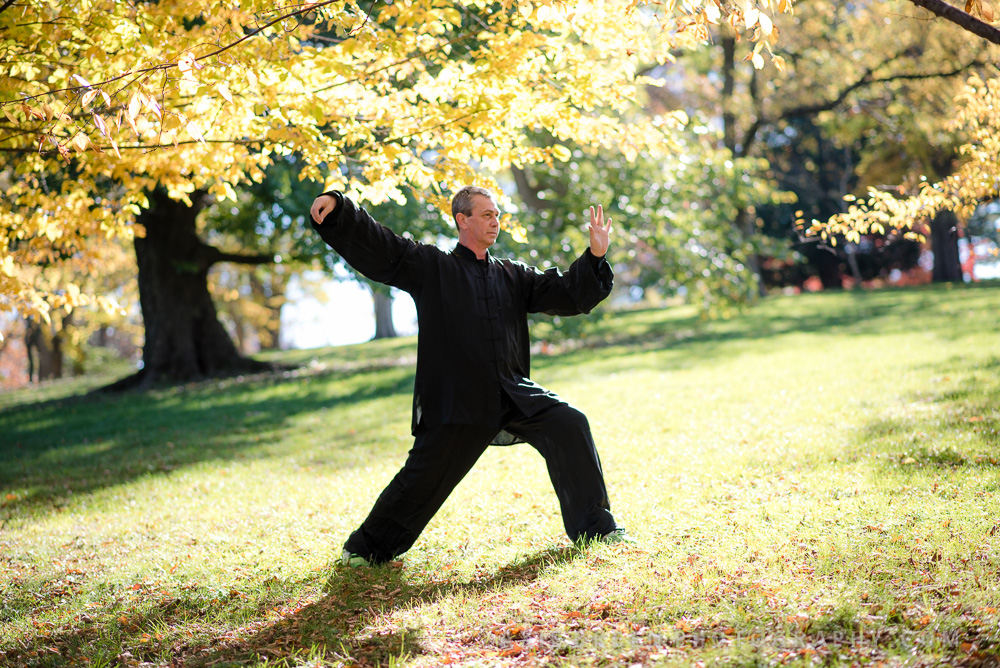
Like the Yin-Yang, Eastern Martial Arts and Western medicine are two halves of a whole. My mission is to preserve the ancient mind-body tools and pass them on to you.
Freeing the Skeleton with the Body Markers: Complete Series
Happy Holidays mind-body students! This will be the final blog of 2017 (can you believe it?) and then we will take our winter break until late January. I hope everyone has learned a lot and benefited from all the content on the blog this year. We always do our best to pick exercises and blog topics that are as relevant as possible to the needs my students have.
Also, a big 'thank you' to all of our new blog readers! December saw a big increase in new subscribers, so I'd like to welcome all our new mind-body students!
This week, we are completing and compiling the blog series on Freeing the Skeleton with the Body Markers. To refresh everyone's memory, here is the introduction I wrote to the first installment of this series:
“The 12 Body Markers are a system that I have used for years to help teach my students both online and in my classes. They are designed to measure a person’s range of motion through all of their joints, using a scale of 1 (least flexible) to 10 (most flexible). In western health an wellness traditions, everyone seems to be able to measure strength, but very few people have a good grasp of flexibility. Even professional athletes often don’t know what the proper range of motion for each of their joints are. Many people are even unsure about what their personal level of flexibility is: usually under or over estimating it until they test it out.
To help address these issues, my wife (Ilana Rosenberg) and I are putting a book together that will feature an extensive guide to the 12 Body Markers to help everyone from average Joe to professional athletes avoid injury, recover from injury more effectively, and recuperate from training faster.
We’ve covered some of these Body Markers in the past on varies blog posts and our mini Office Exercise series. For this blog series, we will be focusing on the 9 Body Markers that measure a person’s flexibility, starting this week from the ground and moving up!”
From there, we covered the 9 Body Markers, moving from the ground up. First we did stationary stretches, and then we did moving exercises. Today, we will do a quick review of all of these steps, so you can easily move from one to the next.
Freeing the Skeleton with the Body Markers: Complete Series
Part 1: Starting from the Ground
We began the first week's post with an ankle stretch. This is a key stretch for improving your walking posture, your balance, and your ability to recover from foot pain. If you don't have the special foot rollers that I do, you can simply use the first step at the bottom of a set of stairs to do the stretch.
We moved on to the quad stretches, either the heron or the "seiza" sitting position. This stretch can release a lot of tension you might not know you have, especially those of us who stand all day for our job.
Lastly, we covered the hamstring stretches. Hamstrings are notoriously the tightest muscle in the modern body, not least of all because we spend much of our day sitting, and very few people do forward folds as much as they should. But not to worry! Now is your chance to start! Loosen up the soft tissue in your hamstrings!
Part 2: Abdomen and Back
In week two we were moving on up to the body with more stationary stretches for the abdomen and back. We did the groin stretch, both using a chair and using a machine. This stretch is key for athletes and "weekend warriors" to avoid injury during their athletic activities. How many times do you sports fans hear about a professional athlete being benched due to a groin injury? They are not fun to have, and they can take a while to heal because the area is where a lot of soft tissue and bone structure connect. Don't hurt your groin, do this stretch!
Next was freeing the hips with the classic hip extension posture against the wall, or free-standing if you want to work on your balance at the same time. Remember: your skeleton is designed for your knees to get right up beneath your collar bone in this position. If you can't get your leg that far up, you have soft tissue tension that needs to be worked on!
To close out week two, I showed you guys the chair twist (which you can easily do in the office), and the "five musketeers" for releasing the stress in your lower back. As the weather gets colder and more snow begins to fall (for my New England readers), keeping your lower back free and healthy is even more important. One wrong move with the snow shovel when your back is tight and you could be in bed for the next three days. Nobody wants that, so be sure to pay attention to your lower back and work toward that 10/10 flexibility.
Part 3: Arms and Shoulder Girdle
In week three, we reached the top of our body with static stretches, starting with the shoulders. The shoulders are a very complex joint, able to move in a huge number of different directions. To free all the tension that occurs because of that complexity, i showed you a set of four stretching postures, using a belt or rope if necessary, to release shoulder stress from every direction.
Next was a new technique I call "Three Postures for the Neck" that helps target one of the most tight areas in the upper body: the neck. With so many people looking down and computers and phones all day, it's no wonder our neck gets tight. Tight necks leads to headaches, walking issues, bad sleep, and a million other potential problems. Definitely do not forget to stretch the neck.
Finally, we did an oldy but a goody: the wrist stretch using the wall. This helps relieve tension in the firearms and hands, and is particularly good for relieving carpal tunnel symptoms, or avoiding them completely.
Part 4: Back to the Ground, in Motion
In week four, we returned to the lower body to learn several moving techniques that can be even better than static stretches at relieving certain tension. First up was leg rotations, which focuses on the knee and ankle joints. Use a chair for this exercise if there is any worry of losing your balance.
Then, we did another new exercise I call "kick backs" which help to release tension in the quads. First we start with small kick backs, bringing the heel up about halfway, and eventually we move on to kicking all the way back and touching the heel to the butt.
Lastly, we did a very advanced movement called the "windmill" to release hamstring stress. This one is not for the feint of heart! If you are not up to the task, don't worry! In the next installment, we showed a movement that can accomplish the same thing with much less effort.
Part 5: Moving the Core
We kicked this week of movements off with a new technique called "Swinging Leg." The side-to-side variation helps you get the best groin stretch, but the forward and backward technique can also release tension in the hamstrings (particularly the forward part of the swing). Don't forget to use a stick or wall to stabilize yourself while doing this. Being stable actually helps you get a better stretch while doing this movement.
Next was a fan-favorite: the Tai Chi Walk! This is a great whole-body movement, and even works the core and the back. But for our purposes in this series, the goal is to gently move the hips to release that soft tissue in the hips. Notice how you do a modified hip extension stretch at the top of every step!
To finish up week five, we did the Tai Chi move "grind." Grind looks like an arm movement, but experienced Tai Chi students will tell you it is all in the core, particularly the lower back. Make sure your belly button moves from side to side while you do the motion. If the naval stays in the same spot the whole time, you are doing an arm movement, not a back movement!
Part 6: Moving the Upper Body
Finally, we completed the series in week six with three upper body movements. We targeted the shoulders first, with my new "Swinging Arms" exercise, which you can do sitting or standing.
Then we moved our head like a pigeon does to gently massage the neck. Throw in some deep breathing here and relax the face too! A tight neck and face feed off of each other. If you can relax both at the same time, you will get the best results.
And to end our exercise routine, we revisited the "40% effort movements" I created for people suffering with arthritis in the arms and hands. These motions are a great way to release all kinds of tension in the elbows, forearms, hands, and even fingers.
And that is it! Talk about freeing the skeleton! I don't think there is a single bone we didn't touch by the end of our techniques.
It's been another great year, and I hope you all keep an eye out for the first blog post of 2018 next month. I'm excited to see what mind-body adventures the new year will bring!
Happy stretching, deep breathing, empty your mind, strengthen your energetic system, and evoke your spirit!
Still searching for a last minute gift for a friend or family member? Do they like exercise, meditation, health and wellness, or stress reduction? My online courses over at Udemy offer all of those things and more, and they are currently on sale! It is the perfect time to pick one up. Remember, setting up a Udemy account is totally free, so anyone can do it.
Is the person you are shopping for more old school? No problem. I have books and DVDs available on Amazon and YMAA. Some of these are also on sale, so hurry and pick them up before you miss out on the savings!
Happy Holidays!
Total Body Scan, Part 3: Dissolving Relaxation
Hello again Mind-Body students! This week we finish up the total body scan series with the total body dissolving relaxation (on two blocks in this video, but you can do it sitting, standing, lying down, and more!).
If you haven't checked out the previous training techniques you should use to prepare for this practice, check them out below:
Face dissolving relaxation
Light and heavy forces technique
Grounding and Rooting
And here is the how-to for the total body scan relaxation!
See you next week! Happy stretching, deep breathing, and empty your mind!
Integrative Pain Management, Part 6: Putting the Tai Chi in Motion
This is a continuation of my Integrative Pain Management series, based on content selected from my chapter of the book Integrative Pain Management: Massage, Movement, and Mindfulness Based Approaches.
See also: Part 1, Part 2, Part 3, Part 4, and Part 5.
For in-depth routines to deal with upper back pain, lower back pain, and other conditions, check out my video courses on Udemy!
The full pain-fighting benefits of Tai Chi are experienced when the techniques, philosophies, and forms of the practice become an integrated whole. Relaxed and graceful movements, body connectedness and structural alignment, and qi circulation and evoking the spirit. Often, the tai chi master will teach just one of these principles for an entire week, until it has become habit for the student. Only then do they move on.
I encourage you to choose one aspect from the following list each time you practice. Focus on that aspect for the entire routine, and be forgiving if you do not perform the other aspects well. Slowly but surely, each aspect will become second nature.
The Major Principles of Tai Chi Movement
- A relaxed and open body, awareness of the alignment of spine and organs.
- An relaxed and open mind, alert to the body's movements, and its own thoughts.
- A well coordinated and aligned body, in each of the major segments:
- Feet planted firmly, with active arches. The body's weight balanced between them.
- A slight bend in the knees, keeping them directly over the middle toes.
- A gentle tension in the groin and anus, retaining qi through the "small heavenly circle."
- A small drop of the tailbone and "pushing out" of the lower back (not butt). The hips are the origin of all the power and movement in tai chi.
- Shoulders and elbows sink downward, become part of the torso structure and allow qi flow through the hands.
- The chin tucks in slightly and the crown point of the head aims straight up, allowing qi flow through the neck.
- The tip of the tongue touches the roof of the mouth, connecting the main qi pathway.
This list is the guide to body balance. As we read earlier in the series, eastern philosophy diagnosis pain as an imbalance somewhere in the body. When the body can be moved and circulated through a balanced tai chi form, the imbalance that is causing the pain is naturally treated.
With continuous practice, all imbalances in the body are naturally treated and lessened by tai chi.
And that completes my blog series based on excerpts from the book Integrative Pain Management: Massage, Movement, and Mindfulness Based Approaches. Next time on the blog: all new content!
Happy Stretching!
Integrative Pain Management, Part 5: The science behind feeling better with Tai Chi
This is a continuation of my Integrative Pain Management series, based on content selected from my chapter of the book Integrative Pain Management: Massage, Movement, and Mindfulness Based Approaches.
See also: Part 1, Part 2, Part 3, and Part 4.
For in-depth routines to deal with upper back pain, lower back pain, and other conditions, check out my video courses on Udemy!
Chronic pain is not something that one can simply choose to stop having. It can be debilitating, in the mind and in the body, to deal with every day. This means that people suffering with chronic pain do not have much energy to expend on getting better. They need treatment that gives results. They need to know that the therapy they are about to try is not a waste of their most precious resources: time and strength.
So when it comes to mind-body therapies like tai chi, what are the measurable benefits? What can people expect to experience when they practice tai chi regularly?
Well first of all, practitioners of tai chi can expect all the benefits that have been linked with regular physical exercise. Tai Chi is, after all, a form of physical exercise. Best of all, it is a low impact form of exercise, which minimizes your risk of injury or inflammation, while also maintaining all of the plus-sides to an exercise routine. As I like to say: No Pain, LOTS of Gain.
What are these plus-sides I mentioned? Lower risk of heart-attack and stroke, increases in muscle strength, better coordination and balance, the list goes on and on. A simple Google search will yield many thousands of research papers written about the benefits of exercise on health.
On the other hand, tai chi is also a form of meditation, a technique which modern scientific study has begun to examine for its health benefits. Chief among these benefits are a positive immune response, and a reduction in stress levels.
Last but not least, tai chi itself has been the subject of several recent studies (which I helped create!) that found it effective for the treatment of pain related to rheumatoid arthritis, osteoarthritis, and fibromyalgia. Scientific studies are slow and expensive, however, and in my years of experience, I have seen tai chi effectively help people who have chronic pain from all kinds of conditions, not just those three.
But remember: a mind-body program is only half of the battle. You need that program to be designed for you as a mind-body prescription by a qualified expert. You wouldn't take pain medication made by someone who doesn't know how it works, and you shouldn't fight pain with a routine made by someone who doesn't know how integrative therapy works.
Next week, we will conclude our series on Integrative Pain Management by reviewing the Core Principles of practicing tai chi, which you can apply to your routine to get the most pain relief out of it. Until next time...
Happy Stretching!
Integrative Pain Management, Part 4: Tai Chi as Balanced Regulation
This is a continuation of my Integrative Pain Management series, based on content selected from my chapter of the book Integrative Pain Management: Massage, Movement, and Mindfulness Based Approaches.
See also: Part 1, Part 2, and Part 3.
For in-depth routines to deal with upper back pain, lower back pain, and other conditions, check out my video courses on Udemy!
Last week, we discussed how Tai Chi philosophy diagnosis pain, especially chronic pain, as an imbalance somewhere in the body. In particular, and imbalance that causes an irregular flow of our qi, or blocks our qi flow entirely. This week, we're diving into the methods by which Tai Chi treats pain inside of the category of integrative pain management.
Tai Chi's dual nature, the yin-yang balance, is often thought of as embodying both water and earth at the same time. Flowing, stable, strong, fluid, yielding, forceful, powerful, smooth. It is a lot to keep in mind while you are doing your exercises! No one masters all of these things all at once, of course. It takes years of practice to work on each facet of a well-rounded tai chi practice.
When you are able to control all these parts of your tai chi, your quality of life and function from day-to-day is highly regulated. It is consistent, balanced, and you are much more in touch with it.
The key elements of how tai chi helps treat chronic pain can be though of as the five regulations.
- Regulating the Body: Relaxation is the first thing that people notice when they begin a tai chi routine. Most experience deep relaxation on their first time doing tai chi. The flow of blood and qi is affected by our stress levels: higher stress means higher blood pressure and worse qi flow. The better we are at relaxing on command, the better for our health.
- Regulating the Breathing: I have talked extensively about breathing on this blog. It is the foundation of regulating every other element on this list. A deep breathing practice that develops the lungs will not only increase oxygen intake, but also strengthen the energetic pathway between the outside universe and the inside universe. The quality of the breath is what allows us to experience healthy qi flow, and also to focus our qi within our body. Both of these abilities are necessary to treat chronic pain.
- Regulating the Mind: Like I spoke about in the previous parts of this series, the mind and the body are linked, and tension or pain the mind can cause similar affects in the body. Developing the ability to calm the mind, and have "thoughts of no thoughts" as I like to say, is key to sustaining the relaxed and steady state that tai chi seeks.
- Regulating the Qi: Once the previous three pieces of these elements begin to develop, the qi will naturally return to a balanced flow. This redoubles the pain-fighitng and healing effects of the tai chi practice. Regulating the body, breath, and mind is like being able to run a full mile without stopping. It is a great foundation. Further regulating the qi on top of that is like improving your time when running that mile. There is always room to grow with qi flow.
- Regulating the Spirit: This step is how you connect your tai chi practice, and your being, to the wider world. It is very important to establish the connection to feel balanced in your life as a whole. A sense of place and belonging, a sense that you are attached to the world, will greatly improve your overall quality of life.
Next week, we will examine the scientific research that has recently shown tai chi and other ind-body practices to be effective as improving health and wellness.
Don't forget! This Sunday, June 26th, I am teaching a 3 hour class on Balance and Stability at YMAA in Andover, MA from 11am-2pm. Please register and join us! I hope to see you guys there.